MW4 DMZ X01 Survival Guide: Entry Tips, Threats and Extraction
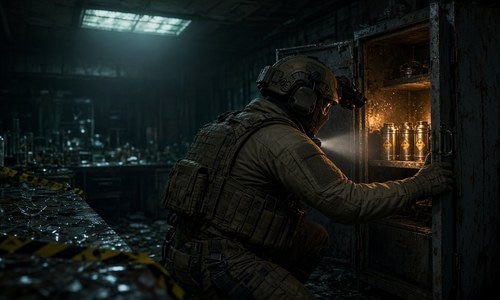
X01 adds a more demanding underground combat environment to MW4 DMZ. Hidden beneath Hajin, this former GRANIT Arms facility contains cargo bays, vehicle depots, underground laboratories, production lines, and a sealed Deep Vault. Unlike a standard deployment across Hajin, exploring X01 requires careful movement, squad coordination, and a clear extraction plan.
The biggest challenge is not simply finding the entrance. Operators must deal with restricted visibility, dangerous enemies, interconnected passages, and limited opportunities to recover from a bad engagement. Before collecting more MW4 DMZ Items or starting new Orders, it is worth preparing a loadout specifically for close-quarters combat and extended underground exploration.
What Makes X01 Different?
X01 is an underground Exclusion Zone accessed through Hajin. Its layout combines narrow tunnels, linking chambers, larger industrial spaces, and multiple vertical routes. This creates several combat situations that are less common in open areas.
Three features deserve particular attention:
- Restricted visibility: Dimly lit passages make it harder to identify threats before they get close.
- Multiple levels: Vertical connections and branching routes can separate squad members if they move without coordination.
- Stronger enemies: The facility contains hostile faction troops, specialists, and more dangerous entities. Fighting every enemy directly can quickly drain ammunition and armor.
The facility also introduces new DMZ Orders, with Ghost providing operational guidance as squads access additional areas. Follow these instructions rather than rushing deeper without understanding the current objective.
Prepare Your Loadout Before Entering
A loadout designed for long-range engagements across Hajin may not be ideal inside X01. Underground encounters often happen at shorter distances, especially around corners, doors, and connecting rooms.
Consider these preparation priorities:
1. Bring a reliable close-range weapon.
An assault rifle with manageable recoil or a suitable close-range secondary can help when enemies appear suddenly. Avoid building your entire loadout around extreme range when much of the fighting takes place indoors.
2. Carry enough armor and healing supplies.
You may encounter several groups before reaching a useful resupply opportunity. Keep enough protection and recovery equipment to survive consecutive engagements rather than spending everything on the first enemy group.
3. Prepare for sustained fighting.
Bring sufficient ammunition and consider equipment that helps control crowded spaces. Reload before entering unfamiliar rooms, and avoid pushing into another section with an almost empty magazine.
4. Coordinate equipment with your squad.
Assign different responsibilities where possible. One player can lead the movement, another can watch the rear, and another can manage equipment or provide supporting fire. This reduces the chance of being surrounded in narrow passages.
Do Not Rely on UAVs Inside X01
One of the most important tactical changes is the restriction on reconnaissance Killstreaks inside the facility. The Season 1 updates disabled UAVs and Advanced UAVs in X01 after earlier adjustments to their duration and range.
That means squads cannot depend on these tools to reveal nearby enemy positions before entering a room. Instead, use a more deliberate approach:
- Check corners before crossing doorways.
- Listen for enemy movement and combat sounds.
- Watch connecting passages while teammates move forward.
- Avoid splitting the squad across different levels without a clear reason.
- Use cover when engaging enemies in larger industrial areas.
The November 16 update also disabled the Bombing Run Killstreak in X01. Do not build your entry strategy around using it to clear groups or control an area.
How to Explore X01 More Safely
A useful approach is to divide the deployment into smaller objectives rather than trying to explore the entire facility in one push.
Start with the immediate objective
Follow the active DMZ Order and identify the next required interaction or destination. Do not spend ammunition fighting optional enemies when your squad needs to reach a specific area.
Clear connected rooms before advancing
When entering a new section, check nearby routes and make sure the squad is together. Moving too quickly through connecting chambers can leave the rear player exposed to enemies approaching from behind.
Treat the Deep Vault as a major objective
The Deep Vault is one of X01’s most significant areas. Reaching it should be a deliberate decision, not an automatic next step after entering the facility. Make sure the squad has enough ammunition, armor, and recovery supplies before committing to deeper exploration.
Keep track of extraction options
X01 can restrict extraction points as the facility responds to intruders. Pay attention to objective updates and available escape routes. Do not wait until the squad is nearly out of resources before discussing how to leave.
Recent DMZ Changes Worth Knowing
Season 1 has introduced several adjustments that affect how players approach DMZ progression:
| Change | What It Means for Players |
|---|---|
| UAVs and Advanced UAVs disabled in X01 | Use sound, positioning, and squad communication to identify threats |
| Bombing Run disabled in X01 | Do not rely on this Killstreak for area clearing |
| Vehicle-kill Weapon XP against AI reduced | Vehicle farming is less effective for weapon progression |
| Operator-kill Weapon XP unchanged | Operator engagements retain their previous Weapon XP behavior |
| Faster Bounty scoring for solos and duos | Smaller squads can progress Bounty objectives at a slightly faster rate |
These changes make preparation and objective selection more important. In particular, players who previously relied on vehicle kills to level weapons should consider other progression methods instead of repeating the same farming routine.
Should You Explore X01 Solo or With a Squad?
Solo deployments offer more control over movement and objective decisions, but they also leave you responsible for every engagement and extraction decision. A single mistake in a narrow passage can be difficult to recover from without teammate support.
Squads have more flexibility when clearing rooms, watching multiple routes, and recovering from unexpected fights. However, that advantage disappears when players move independently or enter different sections without communicating.
For a first visit, a coordinated squad is the safer choice. Learn the facility’s layout, identify dangerous areas, and understand the available extraction process before attempting more aggressive runs.
Players who want to improve their weapon setups outside DMZ can also consider MW4 Bot Lobbies as a separate progression option. That can help keep weapon-unlock goals apart from X01 exploration, where preparation and survival should take priority.
X01 Preparation Checklist
Before deploying, make sure you have:
- A dependable weapon for close and medium-range encounters.
- Enough ammunition for multiple enemy groups.
- Armor and recovery supplies.
- A squad plan for movement and room clearing.
- A clear objective based on your active DMZ Order.
- An extraction plan that can change if routes become unavailable.
X01 rewards careful exploration more than reckless aggression. Learn its connected areas, avoid depending on unavailable reconnaissance tools, and keep the squad prepared to retreat when an engagement becomes too costly. A successful extraction with completed objectives is more valuable than reaching the deepest room without enough resources to get back out.
